Quick Navigation
🚀 Getting Started
Welcome to DewanDigital Enterprise
DewanDigital is a comprehensive governance platform designed to streamline committee management, meeting orchestration, and collaborative decision-making.
First Time Login
- Navigate to the login page
- Enter your email address and password
- Click "Sign In" to access your dashboard
- Optional: Check "Remember me" to stay logged in
System Requirements
- Modern web browser (Chrome, Firefox, Safari, Edge)
- Internet connection
- Screen resolution: 1280x720 or higher recommended
📊 Dashboard
The Dashboard is your central hub for all governance activities.
Dashboard Components
- Welcome Card: Displays your name and role
- Statistics Grid: Shows key metrics (committees, meetings, pending approvals)
- Upcoming Meetings: Lists your next scheduled meetings
- Quick Actions: Fast access to common tasks
Navigation
Use the top navigation bar to access:
- Dashboard: Return to main overview
- Meetings: View and manage all meetings
- Committees: Manage committee structures
- Resolutions: Digital voting and approvals
- Agenda Builder: Create meeting agendas
🔍 Global Search 🆕
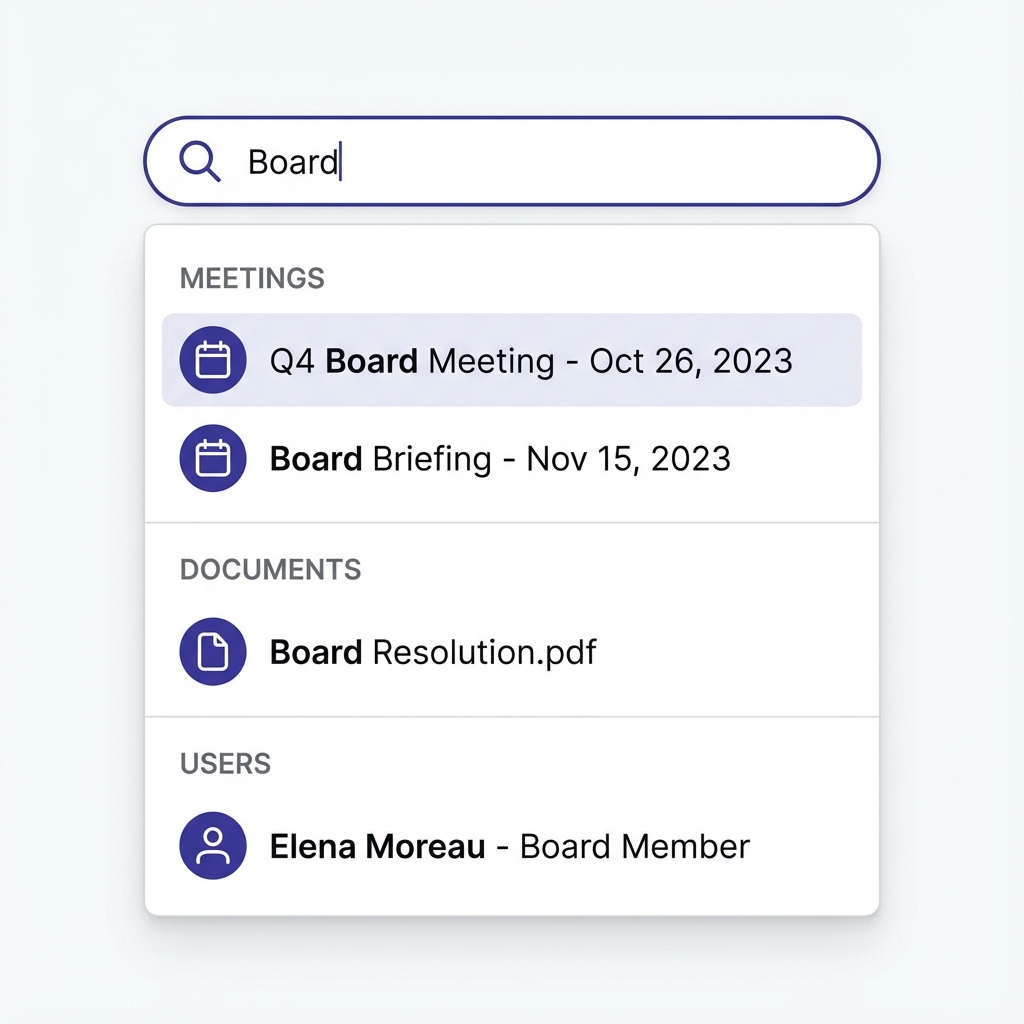
Quickly find meetings, documents, users, or minutes from anywhere in the application.
How to Use
- Access: Click the search bar at the top or use the keyboard shortcut Cmd/Ctrl + K.
- Wildcard Search: Type any part of a word. For example, "Board" will match "Board Meeting", "Board Resolution", etc.
- Categorized Results: Results are grouped by type (Meetings, Documents, Users, etc.) for easy scanning.
👥 Committee Management
Creating a Committee
- Navigate to Committees from the main menu
- Click "+ New Committee" button
- Fill in the committee details:
- Name: Committee name (e.g., "Board of Directors")
- Description: Purpose and scope
- Secretary: Select the committee secretary
- Status: Active or Inactive
- Click "Save" to create the committee
Managing Members
- Click on a committee to view details
- Navigate to the "Members" tab
- Click "Add Member"
- Select user and assign role (Chairman, Member, Observer)
- Click "Save" to add the member
Editing a Committee
- Find the committee in the list
- Click "Edit" button
- Update the necessary fields
- Click "Save" to apply changes
Deactivating a Committee
- Click "Deactivate" next to the committee
- Confirm the action
- The committee will be soft-deleted (can be restored)
📅 Meeting Management
Creating a Meeting
- Go to Meetings page
- Click "+ New Meeting"
- Fill in meeting details:
- Committee: Select the committee
- Title: Meeting title (e.g., "Bil 4/2024")
- Date & Time: When the meeting will occur
- Location: Physical venue or online link
- Click "Create Meeting"
Meeting Lifecycle
- Draft: Initial creation, agenda being built
- Scheduled: Meeting confirmed, invites sent
- In Progress: Meeting is live
- Completed: Meeting ended, minutes pending
- Closed: Minutes approved and published
Viewing Meeting Details
- Click on any meeting from the list
- View comprehensive details including:
- Meeting information
- Agenda items
- Attendees
- Documents
- Minutes status
📋 Agenda Builder
The Agenda Builder allows you to create structured, professional meeting agendas.
Building an Agenda
- Click "Agenda Builder" from the navigation
- Fill in meeting details on the left panel
- Click "Add Main Item" to add agenda items
- For each item, specify:
- Title: Agenda item name
- Description: Details and notes
- Duration: Estimated time in minutes
- Presenter: Who will present this item
- Sensitivity: Mark if conflict of interest applies
- Click "Add Sub-item" to create nested items
- Drag items to reorder them
- Click "Save Changes" when done
Attaching Documents
- Save the agenda first
- Click "Attach File" on any agenda item
- Select the document from your computer
- The document will be uploaded and linked to the item
Drag & Drop Reordering
Click and hold the drag handle (≡) on the left of each item, then drag to reorder. The system will automatically update the numbering.
🎥 Video Call Integration 🆕
Seamlessly integrate Google Meet, Zoom, Microsoft Teams, or any video conferencing platform with your meetings.
Adding a Video Link
- Open Agenda Builder for your meeting
- Scroll to the "Video Call Link" field
- Choose one of two methods:
- Quick Helpers: Click "Create Google Meet" or "Start Zoom Meeting" to create a meeting in a new tab
- Paste Link: If you already have a meeting link, paste it directly
- Copy the video meeting URL and paste it into the field
- Click "Save Changes"
💡 Supported Platforms
- Google Meet: meet.google.com/xxx-xxxx-xxx
- Zoom: zoom.us/j/1234567890
- Microsoft Teams: teams.microsoft.com/l/meetup-join/...
- Any other platform: Just paste the URL!
Platform Detection
The system automatically detects which platform you're using and displays an appropriate button:
- Google Meet: Green "Join Google Meet" button
- Zoom: Blue "Join Zoom" button
- Microsoft Teams: Purple "Join Microsoft Teams" button
- Other platforms: Indigo "Join Video Call" button
Joining a Video Call
- Open the Live Room for your meeting
- Look for the prominent, animated button in the top bar
- Click "Join [Platform Name]"
- The video call opens in a new tab
- Continue using DewanDigital for agenda, voting, and chat
✨ Key Benefits
- Zero Setup: No API keys or configuration needed
- Platform Freedom: Use any video service you prefer
- User Control: Each user manages their own video account
- No Cost: Completely free, no subscriptions
- Mobile Friendly: Works on all devices
Best Practices
- Create video meetings at least 24 hours before the scheduled meeting
- Test the video link before the meeting starts
- Include the video link in meeting invitations
- Use the same platform consistently for your organization
- Keep backup links ready in case of technical issues
🎥 Live Room (Sync Mode)
The Live Room enables real-time collaboration during meetings.
Starting a Live Session
- Open the meeting details
- Click "Enter Live Room"
- The meeting status changes to "In Progress"
- All participants can join and see real-time updates
Live Room Features
- Attendance Tracking: Mark members as present/absent/apology
- Agenda Progress: Navigate through agenda items
- Live Notes: Take collaborative notes in real-time
- Timer: Track time spent on each agenda item
- Action Items: Record decisions and action points
Recording Attendance
- In the Live Room, find the "Attendance" section
- For each member, select:
- Present: Member is attending
- Absent: Member is not attending
- Apology: Member sent apologies
- Attendance is automatically saved
Navigating Agenda Items
- Current agenda item is highlighted
- Click "Next Item" to move forward
- Click "Previous Item" to go back
- All participants see the same current item
Ending the Session
- Click "End Meeting"
- Confirm the action
- Meeting status changes to "Completed"
- Proceed to generate minutes
📱 QR Code Joining 🆕
Join live meetings instantly by scanning a QR code with your mobile device - no login required!
How to Join via QR Code
- Open the Live Room on your desktop/laptop
- Click the "Share" button in the top bar
- A QR code will be displayed in the share modal
- Using your mobile device:
- Open your camera app
- Point it at the QR code
- Tap the notification that appears
- The meeting opens in Kiosk Mode on your mobile device
🎯 What is Kiosk Mode?
Kiosk Mode is a read-only view perfect for:
- Display Screens: Show meeting progress on TVs or monitors
- Observers: Allow non-members to follow along
- Mobile Viewing: Quick access without logging in
- Public Meetings: Share with stakeholders
Kiosk Mode Features
✅ What You Can See:
- Current agenda item
- Full agenda list
- Meeting details
- Attendee count
- Video call button (if link added)
❌ What You Cannot Do:
- Vote on resolutions
- Send chat messages
- Mark attendance
- Control meeting flow
- Edit agenda items
Sharing the QR Code
- In the Live Room, click "Share"
- The share modal displays:
- Live Room Link: For authenticated members (voting & chat)
- Video Call Link: To join the video conference
- QR Code: For quick mobile access
- Click "Copy" next to any link to share via email or messaging
- Or display the QR code on a screen for in-person attendees
💡 Use Cases
- Hybrid Meetings: In-person attendees scan to follow on their phones
- Conference Rooms: Display QR code on entry for easy joining
- Public Sessions: Allow community members to observe
- Backup Access: Quick access if login issues occur
Security Considerations
- Read-Only Access: Kiosk mode cannot make changes or vote
- No Authentication: Anyone with the QR code can view
- Public Meetings: Only share QR codes for non-confidential meetings
- Sensitive Items: Mark agenda items as "sensitive" to control visibility
- Meeting Status: Only published/live meetings are accessible via QR code
Troubleshooting
QR code won't scan:
- Ensure good lighting and camera focus
- Try moving closer or further from the code
- Use the "Copy Link" button and paste in mobile browser instead
Page shows "404 Not Found":
- Ensure the meeting is published or live
- Check that the meeting hasn't been deleted
- Try refreshing the page
📝 Minutes Repository
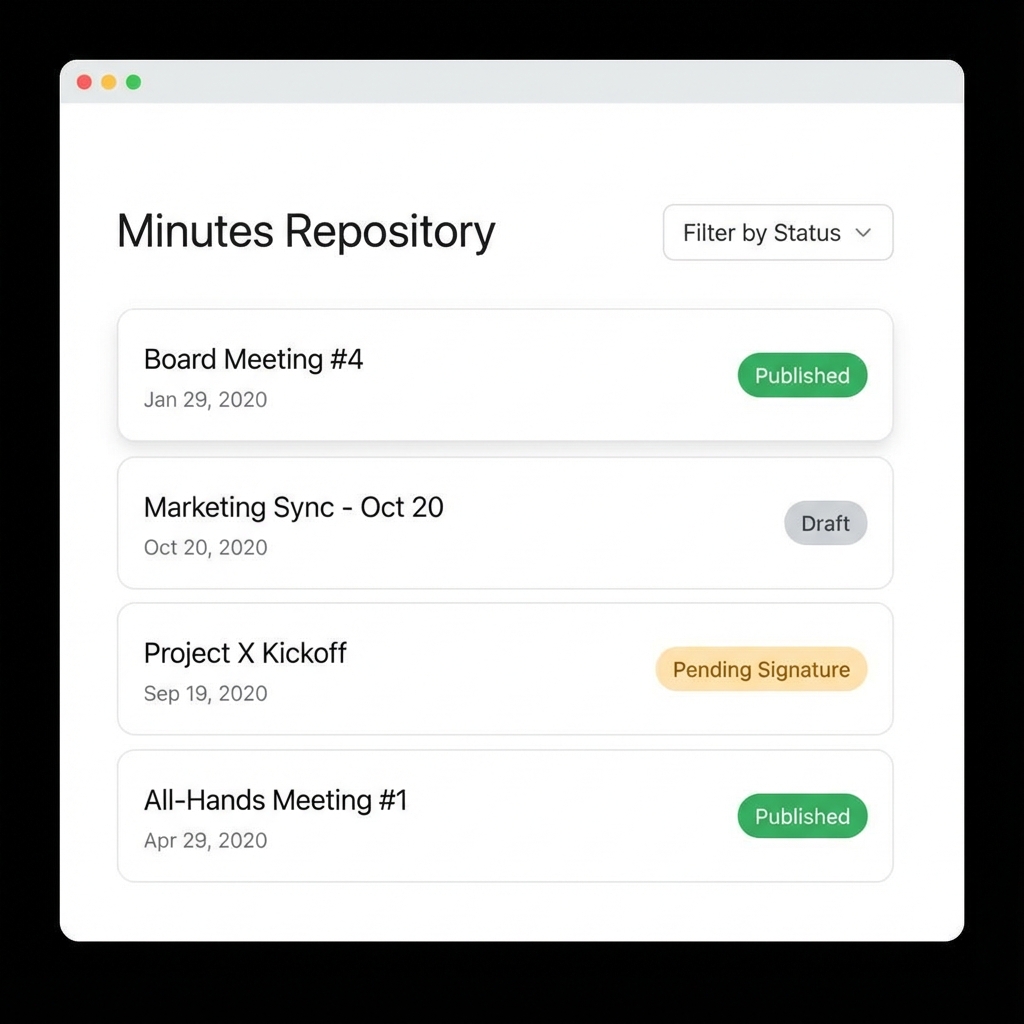
A centralized hub for Board Secretaries to manage all meeting minutes with ease.
Key Features
- Centralized List: View minutes from all meetings in one place.
- Status Tracking: Instantly see if minutes are Draft, Pending Signature, or Published.
- Filtering: Use the "Filter by Status" dropdown to focus on "Pending Signature" items.
AI-Powered Generation
- After meeting ends, go to "Minutes"
- Click "Generate with AI"
- AI analyzes meeting data and creates draft minutes
- Review and edit the generated content
Manual Editing
- Use the rich text editor to format minutes
- Add headings, lists, and formatting
- Include action items with:
- Description
- Assignee
- Due date
- Click "Save Draft" to save progress
Approval Workflow
- Draft: Secretary edits minutes
- Review: Submit for review
- Secretary Sign: Secretary approves
- Chairman Sign: Chairman approves
- Published: Minutes are finalized
Submitting for Review
- Complete editing the minutes
- Click "Submit for Review"
- Minutes are locked from further editing
- Awaits secretary signature
Digital Signatures
- Secretary: Click "Sign as Secretary"
- Chairman: Click "Sign as Chairman"
- Each signature is timestamped
- After both signatures, click "Publish"
Extracting Action Items
The AI can automatically extract action items from minutes. These include assignee, description, and due date, making follow-up easier.
🗳️ Circular Resolutions
Circular Resolutions enable digital voting on decisions outside regular meetings.
Creating a Resolution
- Navigate to Resolutions
- Click "+ New Resolution"
- Fill in details:
- Committee: Select committee
- Title: Resolution title
- Description: Full details of the resolution
- Deadline: Voting deadline
- Click "Save as Draft" or "Circulate Now"
Voting on Resolutions
- Open the resolution from your list
- Read the full description
- Choose your vote:
- Approve: Support the resolution
- Reject: Oppose the resolution
- Add optional remarks
- Click "Submit Vote"
Vote Summary
View real-time vote counts:
- Approved: Number of approve votes
- Rejected: Number of reject votes
- Pending: Members who marked as pending
- Not Voted: Members who haven't voted
Auto-Resolution
When a simple majority (>50%) is reached, the resolution automatically changes status to "Approved" or "Rejected".
📦 Board Pack Generation
Generate comprehensive PDF board packs for meetings.
Generating a Board Pack
- Open the meeting details
- Click "Generate Board Pack"
- The system compiles:
- Meeting information
- Agenda with all items
- All attached documents
- Previous minutes (if applicable)
- Download the generated PDF
Board Pack Contents
- Cover page with meeting details
- Table of contents
- Full agenda with descriptions
- Supporting documents
- Professional formatting
👥 User & Access Management
Manage your organization's members, roles, and access rights securely.
Adding New Members
- Navigate to "Users" or select "Manage Users" from your profile menu.
- Click "Add Member".
- Enter details (Name, Email, Role, Designation).
- Password: You can set a password or use the Generate button to create a strong secure password instantly.
- Click Save Member.
Roles & Permissions
- Super Admin: Full system access, including system settings.
- Board Secretary: Can manage meetings, agendas, users, and minutes.
- Board Member: Can view meetings, documents, and vote on resolutions.
- Management: Can upload papers and view limited meeting info.
✅ Matters Arising (Action Items)
Track and follow up on decisions and tasks resulting from meetings.
Tracking Actions
- Go to "Matters Arising" / "Action Items".
- View tasks organized by status: Pending, In Progress, Completed.
- Click "New Action Item" to manually create a task if not extracted from minutes.
Updating Progress (Live Room)
- In the Live Room, navigate to the "Matters Arising" agenda item.
- You will see a list of outstanding items from previous meetings.
- Click the Checkmark Icon to mark an item as complete instantly.
Board Pack View
Outstanding Matters Arising are automatically included as a dedicated table in the generated Board Pack PDF for easy reference by board members.
🔔 Notification System
Stay updated with important events like new meeting invitations and resolutions.
The Notification Bell
- Located in the top navigation bar.
- A Red Badge indicates the number of unread notifications.
- The badge updates automatically every 30 seconds.
Managing Notifications
- Click the Bell icon to open the dropdown.
- Click on any notification to view details (e.g., go to the meeting page).
- Use "Mark all read" to clear the badge count.
🤖 AI-Powered Features 🆕
DewanDigital includes powerful AI features to streamline your workflow.
AI Draft Generation
- Navigate to Meetings → Select Meeting → Minutes
- Click "Generate AI Draft" button
- Wait ~1 second for AI to generate content
- If content already exists, click "Load AI Suggestion" to view the generated draft
- Edit the generated content as needed
- Click "Save Draft"
💡 Tip: The AI generates minutes based on your agenda items and meeting details. For best results, ensure your agenda is complete before generating.
What the AI Generates
- Meeting header with date, time, and location
- Attendance section (to be filled in)
- Discussion points for each agenda item
- Resolutions and decisions
- Action items
- Next meeting and adjournment sections
Loading Saved AI Suggestions
If you've previously generated an AI draft:
- Look for the "Load AI Suggestion" button (appears if a suggestion exists)
- Click to load the previously generated content
- The AI draft will replace your current content
🎯 Extract Action Items 🆕
Automatically detect and create action items from your meeting minutes using AI.
How to Extract Actions
- Write your minutes using keywords:
Action:,Task:,Follow-up:, orTODO: - Click "Extract Actions" button
- Review detected action items in the amber box
- For each item:
- Select assignee from dropdown (meeting attendees)
- Set due date (defaults to 7 days from today)
- Click "Create All" to add them to the Action Items tracker
✅ Example:
                                    Action: Finance team to prepare Q2 budget report by March 31st.

                                    Task: HR to organize team building event next month.

                                    Follow-up: Secretary to distribute meeting minutes within 48 hours.
What Happens After "Create All"?
- All action items are saved to the database
- Items appear at Action Items page
- Assigned persons receive notifications (if enabled)
- Items show on assignee's dashboard
- You can track progress: Open → In Progress → Completed
Managing Created Action Items
- Go to Action Items page
- Click on any item to edit details
- Update status as work progresses
- Add completion notes when marking as completed
- Filter by status or search for specific items
🛡️ Enterprise Governance 🆕
Phase 7 introduces enterprise-grade security and governance features.
Two-Factor Authentication (2FA)
Enhanced security for your account:
- Go to Profile → Security Settings
- Click "Enable 2FA"
- Scan QR code with Google Authenticator or similar app
- Enter verification code to activate
- Save backup codes in a secure location
Audit Trail
All sensitive actions are logged for compliance:
- User changes (name, email, status)
- Document uploads and modifications
- Meeting status changes
- Minutes approvals and signatures
Admins can view the complete audit log at Admin → Audit Log
PDF Watermarking
Downloaded board packs include watermarks with:
- User name and email
- Download timestamp
- IP address
This prevents unauthorized sharing of confidential documents.
OCR & Full-Text Search
Search within PDF documents:
- Uploaded PDFs are automatically processed for text extraction
- Use the global search to find content within documents
- Results show matching documents with highlighted text
Document Annotations
Add notes and highlights to PDF documents:
- Private annotations: Only you can see them
- Shared annotations: Visible to all committee members
- Supports highlights, notes, and drawings
Risk Register
Track and manage organizational risks:
- Record risks with likelihood and impact scores
- Automatic risk level calculation (Critical/High/Medium/Low)
- Color-coded risk matrix
- Track mitigation strategies
Conflict of Interest (COI)
Annual COI declarations:
- Members submit annual declarations
- System tracks active conflicts
- Warnings appear in agenda builder for sensitive items
- Maintains compliance records
📝 Attendance & Minutes
Managing Attendance in Minutes
The Minutes Editor includes a powerful Attendance Record tool.
- Open the Minutes Editor for a closed meeting.
- Scroll to the Attendance Record card.
- The system pre-fills status based on Live Room logins.
- Manually toggle status: Present, Absent, or Apology.
Inserting Attendance List
Once attendance is verified:
- Click the "Insert into Minutes" button.
- A formatted list (Present/Absent/Apologies) is automatically added to the top of your minutes text.
🌓 Dark Mode
Enabling Dark Mode
- Look for the theme toggle icon in the top-right corner
- Click the moon icon (☾) to enable dark mode
- Click the sun icon (☀) to return to light mode
- Your preference is saved automatically
Benefits of Dark Mode
- Reduces eye strain in low-light environments
- Saves battery on OLED screens
- Modern, professional appearance
- All features work identically in both modes
💡 Tips & Best Practices
📋 Agenda Planning
Build agendas at least 48 hours before meetings to give members time to review materials.
📝 Minutes Accuracy
Review AI-generated minutes carefully. While AI is helpful, human oversight ensures accuracy.
🗳️ Timely Voting
Set realistic deadlines for circular resolutions to ensure all members have time to vote.
📦 Document Organization
Attach documents to specific agenda items for better organization and easy reference.
🆘 Need More Help?
If you need additional assistance:
- Contact your system administrator
- Check the README.md file for technical documentation
- Review the Product Requirements Document (PRD)